If you want to learn how to boil chicken for soup, the short version is this: start the meat in cold water, bring it up to a gentle simmer between 88 C and 94 C, and never let it hit a hard boil. Boneless breasts take 15 to 20 min, bone-in pieces about 30 min, and a whole bird 60 to 90 min. Pull the chicken the moment it reads 74 C, which is 165 F, the safe minimum the USDA sets for poultry. Rest it a few minutes, then shred. You get moist meat and a broth clear enough to build a real soup on.
How to Boil Chicken for Soup, Step by Step
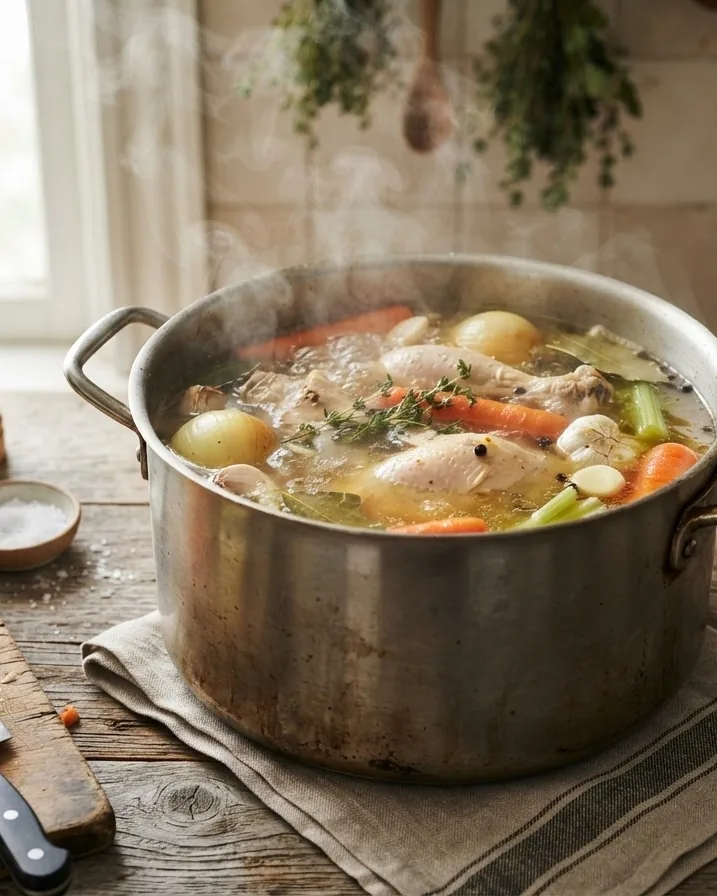
I run this same sequence in my kitchen whether I am making a quick weeknight bowl or a big Sunday pot. The order matters more than any single trick. Cold water, slow heat, gentle bubbles, and a thermometer will beat guesswork every time. Below is the exact routine I follow, and it works with breasts, thighs, or a whole chicken. If you want a deeper look at long-simmered stock, my guide to bone broth covers the low, slow end of the same craft.
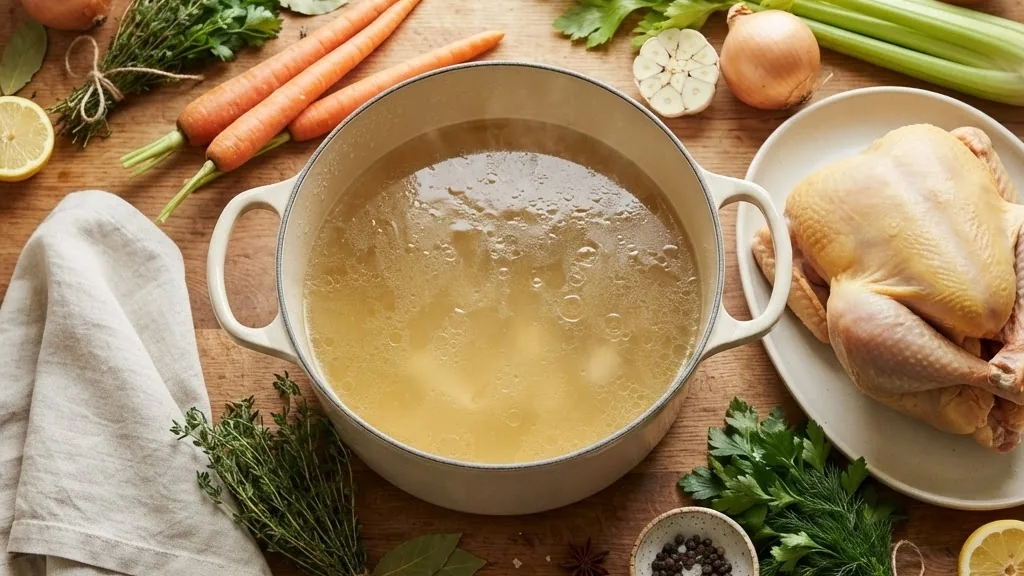
- Rinse and load the pot. Put the chicken in a heavy pot and cover it with cold water by about two inches. Cold water is not a small detail. A slow rise pulls flavor into the liquid and keeps the outside from seizing before the center warms.
- Add your aromatics. Drop in a halved onion, a couple of carrots, two celery stalks, two bay leaves, and a small handful of peppercorns. Keep them whole so you can lift them out later.
- Bring it up slowly. Set the burner to medium. You want the water to climb over about 10 min, not blast to a boil in three.
- Drop to a simmer. As the first bubbles break, lower the heat until the surface just shivers. Hold it at that gentle roll, roughly 88 C to 94 C.
- Skim the foam. For the first 10 to 15 min a gray scum rises. Lift it off with a spoon for a cleaner broth.
- Check the temperature. Probe the thickest part, away from bone. You are looking for 74 C, or 165 F. Time is a guide; the thermometer is the ruling.
- Rest and shred. Move the chicken to a board, wait 5 to 10 min, then pull it apart. Strain and save the broth.
That is the whole method. Everything else in this guide is about doing each of those seven moves well, so your meat stays tender and your soup base tastes like more than salty water.
Bone-In or Boneless: Which Chicken Makes Better Soup?
Both work, and the right pick depends on what you value that day. Boneless skinless breasts are fast and easy to shred, and they cook through in 15 to 20 min. The trade-off is a thinner broth, because most of the flavor and body in chicken soup comes from bones, skin, and connective tissue. If speed is the goal and you already have a good stock on hand, boneless is a fair choice.
Bone-in pieces tell a different story. Thighs, drumsticks, and split breasts carry collagen that melts into the water over about 30 min and gives the liquid a rounder, silkier feel. The skin adds richness you can skim later if you want it lighter. My habit is to use bone-in thighs when the broth is the star and boneless breast when I just need clean shreds for a fast pot of noodle soup.
A whole chicken splits the difference. You get white meat, dark meat, bones, and skin all in one pot, which is why the classic grandmother method starts with a whole bird. It asks for more time, 60 to 90 min, but it rewards you with the deepest flavor and enough meat for several meals. When I want leftovers, that is the route I take.
Simmer, Do Not Boil: The 88 C to 94 C Window
The single biggest mistake people make is a genuine, rolling boil. It feels productive, all that churn and steam, but it fights you. Hard boiling agitates the proteins in the meat so they tighten and squeeze out moisture, and it drags fat and scum back into the liquid so the broth turns cloudy and greasy. You end up with stringy, dry chicken swimming in murky water.
A simmer solves both problems. Held between 88 C and 94 C, the water moves just enough to cook the meat evenly while the collagen slowly softens. The proteins relax instead of clenching, so the chicken stays juicy. The broth stays clear because you are not blasting particles into suspension. Look for small bubbles rising in lazy streams and a surface that trembles rather than rolls.
If your pot creeps toward a boil, do not panic. Nudge the burner down a notch, or slide the pot half off the flame. On my old electric range I keep it between the second and third setting and check every few minutes. Once you learn the sound of a proper simmer, a soft murmur rather than a loud gurgle, you can almost run the pot by ear.
Chicken Boiling Times and Temperatures by Cut
Use this table as your starting point, then confirm doneness with a thermometer. Times assume a steady simmer, not a boil, and they shift a little with piece size and how cold the meat was going in. The safe internal temperature never changes: every cut is done at 74 C, which is 165 F.
| Chicken cut | Simmer time | Safe internal temp |
|---|---|---|
| Boneless skinless breast | 15 to 20 min | 74 C / 165 F |
| Boneless thigh | 15 to 20 min | 74 C / 165 F |
| Bone-in thigh or drumstick | about 30 min | 74 C / 165 F |
| Bone-in split breast | 30 to 40 min | 74 C / 165 F |
| Whole chicken (1.5 to 2.5 kg) | 60 to 90 min | 74 C / 165 F |
Notice that boneless pieces land in a tight window while bone-in cuts spread wider. Bone slows heat transfer, so a thick split breast can need 40 min while a slim drumstick is done nearer 30 min. A whole bird depends heavily on weight, which is why I lean on the probe instead of the clock once the pot passes the one-hour mark.
Skimming the Foam for a Clear Broth
In the first 10 to 15 min of simmering, a grayish foam gathers at the edges and center of the pot. That scum is coagulated protein and stray impurities that leave the meat as it heats. It is not dangerous, and if you stir it back in nothing bad happens to your health. What suffers is the look and taste of the broth, which turns dull and slightly muddy.
So I skim. A wide spoon or a small fine strainer works. Skim gently along the surface and toss what you lift. You mostly need to do this early, while the foam is still forming. Once the pot settles into a clean simmer, the surface stays calm and you can leave it alone. This one small habit is the difference between a broth that looks homemade and one that looks like it came from a can.
Aromatics That Build the Broth
Boiling chicken in plain water gives you cooked chicken and not much else. The broth is where soup earns its keep, and aromatics do the heavy lifting. My baseline is the classic trio plus a few extras that cost almost nothing and add real depth.
- Onion: one large, halved with the skin on for a touch of golden color.
- Carrot: two, cut into big chunks so they are easy to remove.
- Celery: two stalks, leaves and all, for a green, savory note.
- Bay leaves: two, which add a soft herbal background.
- Peppercorns: a teaspoon of whole black pepper for gentle heat.
- Parsley stems and garlic: optional, but both deepen the base.
Add these at the start so they steep the entire time. Keep everything in large pieces rather than a fine dice. You are steeping the liquid, not building a stew, and big chunks strain out cleanly at the end. If I have a leftover parmesan rind or a few dried mushrooms, in they go too, which pushes the savory quality even further without a single packaged shortcut.
The Safe Internal Temperature: 74 C / 165 F
This is the number that keeps your family safe, so it is worth stating plainly. According to the USDA, all poultry is safe to eat once the thickest part reaches 74 C, which is 165 F, measured with a food thermometer. You can read the agency’s food data and guidance through the USDA FoodData Central resource, which backs the same minimum that appears on every official chart.
Why that exact figure? At 165 F the heat destroys Salmonella, the most heat-resistant pathogen of real concern in raw poultry, along with Campylobacter. Color is a poor guide here. Chicken can look faintly pink near the bone and still be perfectly safe once it has hit temperature, and it can look pale while the center lags behind. The thermometer removes the doubt, which is why I keep an instant-read probe next to the stove.
The same standard shows up in consumer guidance from the FDA. Their storage and handling charts, published at the FDA website, list 165 F as the cook-to target for poultry and pair it with clear rules for chilling leftovers quickly. When two agencies, the USDA and the FDA, land on the identical number, you can treat it as settled. Cook to 74 C, confirm with a probe, and you are on safe ground.
Shredding and How Much Meat You Get
Pull the chicken from the pot the instant it reaches temperature. Leaving it to sit in near-boiling water past that point only tightens the fibers and dries the meat, undoing your careful simmer. Set it on a board and let it rest for 5 to 10 min so the juices settle back into the muscle instead of running out the moment you cut in.
Then shred. Two forks, clean fingers, or a stand mixer paddle on low all work. I pull with the grain into bite-size strands rather than chopping, because ragged shreds catch broth and cling to noodles better than neat cubes. Warm meat shreds far easier than cold, so do it while the chicken is still comfortable to handle.
Yield is easy to plan around. One pound of raw boneless breast, about 450 g, cooks down to roughly 2.5 to 3 cups of shredded meat, with 3 cups being the number I count on for a family pot. Poaching in soup keeps more moisture than roasting, so you tend toward the higher end. A whole 1.5 kg bird gives you enough for a big soup plus a lunch of chicken salad the next day.

Saving and Storing the Broth
Never pour that broth down the drain. Once you have skimmed and simmered a pot, you are holding real stock. Strain it through a fine sieve to catch the aromatics and any stray bits, then let it cool. If you want it lean, chill the broth and lift off the fat cap that forms on top; a cup of well-skimmed homemade broth carries only around 15 calories. That same base is the backbone of a proper chicken gumbo once you are ready to build something bigger.
Storage follows the same food-safety rules the USDA and FDA publish. Get the cooked chicken and broth into the refrigerator within 2 hours of cooking, held at 4 C, which is 40 F, or below. Both keep well for 3 to 4 days in an airtight container. If your kitchen is very warm, above about 32 C, tighten that window to 1 hour before chilling.
For longer keeping, freeze. Cooked chicken and broth hold their quality in the freezer at -18 C, or 0 F, for roughly 2 to 6 months. I freeze broth in labeled quart jars and pint containers, leaving headroom for expansion, so a fast weeknight soup is never more than a thaw away. Freezing does not make food unsafe indefinitely, but flavor and texture fade past the six-month mark, so I rotate stock rather than hoard it.
The Right Pot, Water, and Salt
Gear matters less than technique, but a few choices make the job smoother. Reach for a heavy pot with a thick base, since it holds a steady simmer instead of swinging between a boil and a stall. A five-quart pot suits two split breasts or four thighs; a whole bird wants at least eight quarts so the water covers it fully. Wide and tall both work, though a taller pot loses less liquid over a long 60 to 90 min simmer.
Cover the chicken with cold water by about two inches, no more. Too much water dilutes the broth and takes longer to heat; too little leaves the top of the meat poking out and cooking unevenly. As the pot simmers, the level will drop, so on a long session I keep a kettle of hot water nearby and top up if the meat threatens to surface. That keeps everything submerged without shocking the pot with a cold splash.
Go easy on salt at the beginning. Broth concentrates as it simmers and reduces, so a pot that tastes right early can turn too salty by the end. I add a small pinch to help the flavors open up, then correct the seasoning once the meat is out and the broth is strained. That way the final soup lands where I want it, not where an early guess put it.
What to Do With the Meat and Broth
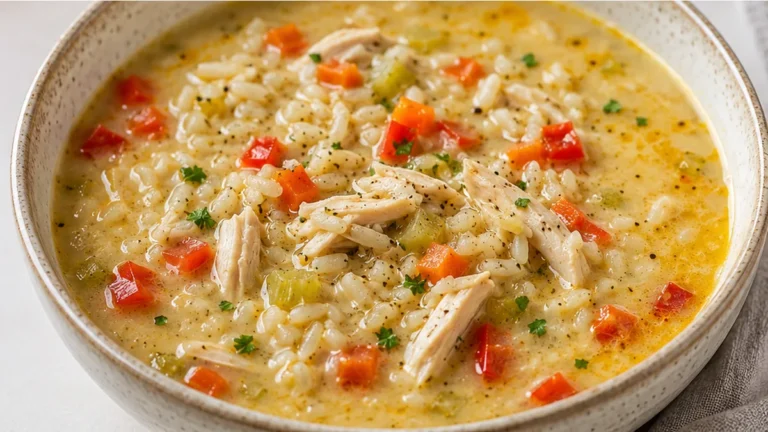
Once you have tender shreds and a clear base, the payoff is how many meals it feeds. Classic chicken noodle is the obvious move: warm the broth, add noodles and the reserved vegetables, and fold the shredded meat back in at the end so it stays soft. The same shreds carry a rice soup, a tortilla soup, or a quick pot with orzo and lemon. Because the meat is already cooked to 74 C, you only need to warm it, not simmer it again.
Beyond soup, that pound of shredded chicken, roughly 3 cups, stretches into chicken salad, tacos, enchiladas, or a fast pasta. I portion extra into containers the same day I cook, since the 3 to 4 days of safe refrigerator life starts ticking the moment the pot comes off the heat. Planning two dishes from one boil is how a single afternoon of cooking covers half a week of lunches without any packaged shortcuts.
Common Mistakes and Easy Fixes
A few small errors show up again and again, and each has a quick fix. Boiling too hard is the classic; drop to a simmer and the meat stops toughening. Skipping the skim leaves you with cloudy broth; lift the foam in the first 15 min and the liquid clears. Salting heavily at the start can leave you stuck, because the broth concentrates as it reduces, so I salt lightly early and adjust at the end.
Overcooking is the sneakiest problem. Chicken does not improve by sitting at a simmer for an extra half hour; it just dries out. Once the probe reads 74 C, the meat is done, full stop. Pull it, rest it, and let the vegetables and bones keep steeping if you want more broth flavor. Cook the meat to temperature, then let time work only on the liquid, and you get the best of both.
Making It Ahead and Scaling Up
This method scales cleanly, which is why I treat a boil as batch cooking rather than a single meal. Doubling the chicken does not double the time much; a fuller pot simply takes a few extra minutes to return to a simmer after you add the meat. Keep the water covering everything by two inches and hold the same gentle 88 C to 94 C range. The thermometer still calls the finish at 74 C no matter how many pieces are in the pot.
For make-ahead soup, I cook the chicken and broth a day early and store them separately in the refrigerator, where both stay good for 3 to 4 days. Keeping the shredded meat out of the broth until serving stops it from soaking up liquid and going mushy. When soup time comes, I heat the broth, drop in noodles or rice, and add the chicken in the last few minutes. If I am cooking for the freezer, I chill everything fast, pack it flat, and label the date so nothing lingers past the 2 to 6 month quality window.
Frequently Asked Questions
Should I boil chicken covered or uncovered for soup?
Leave the lid slightly ajar or off. A fully covered pot traps heat and can push a gentle simmer up into a boil without you noticing, which toughens the meat. A cracked lid lets you hold that steady 88 C to 94 C range and makes it easy to skim the foam in the first 10 to 15 min. If you are simmering a whole bird for 60 to 90 min and worry about the liquid dropping too low, rest the lid partly on to slow evaporation while you keep an eye on the bubbles.
Can I use the boiling water as broth, or should I start fresh?
The cooking water is your broth, and that is the whole point of poaching chicken this way. As long as you started in cold water with aromatics and held a clean simmer, the liquid is well seasoned and full of body. Skim the foam early, strain out the vegetables at the end, and you have stock ready to use or store for 3 to 4 days in the refrigerator. Only start fresh if you boiled the chicken in heavily salted water or with strong seasonings that would not suit your final soup.
How do I know the chicken is done without a thermometer?
A thermometer is the reliable way, and I strongly recommend one, since the USDA target of 74 C, or 165 F, is not something you can eyeball with confidence. If you truly have no probe, cut into the thickest part: the juices should run clear, not pink, and the meat should be opaque all the way through with no glassy or rubbery texture near the bone. For a whole chicken, a leg that wiggles loosely in its socket after 60 to 90 min is another sign. Still, a cheap instant-read probe pays for itself in peace of mind.