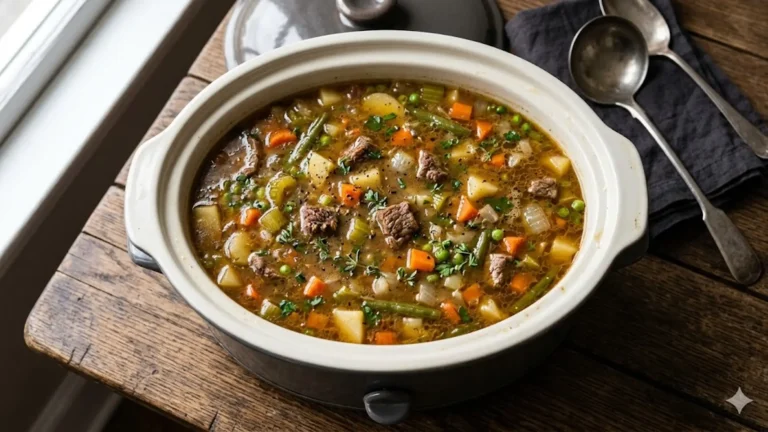
How do i make vegetable beef soup that is rich, tender, and tastes like it simmered all day? The honest answer is that it comes down to four moves done in the right order: brown the beef hard for flavor, build a base with onion and tomato paste, simmer the meat low and slow until it is fork-tender, and add the vegetables in stages so each one finishes perfectly instead of turning to mush. Use a well-marbled cut like chuck, give it time, and salt it properly, and you will end up with a deep, hearty pot that feeds a crowd and freezes beautifully. This guide walks through the whole process step by step, with the exact order to add each vegetable, the best beef to use and why, how to fix tough meat, and slow cooker and Instant Pot versions for when you want to set it and forget it. By the end you will be able to make this soup from whatever is in your fridge, no recipe card required.
This is real cold-weather food, the kind of pot I keep going through the winter, and it is far more forgiving than it looks. Let us build it together, in US measurements.
The Short Answer: Four Steps
Before the detail, here is the whole soup in one breath. Brown about 1.5 pounds of cubed beef in a hot pot until deeply seared. Take it out, soften an onion in the drippings, stir in tomato paste and let it darken, then deglaze with a splash of broth or wine. Return the beef, cover with broth and canned tomatoes, and simmer 60 to 90 minutes until the meat is tender. Then add your vegetables in order of how long they take to cook, finishing the quick ones in the last few minutes. Season, and you are done. Everything below is just the why behind each step.
Step 1: Choose and Brown the Beef

The cut you choose decides how tender your soup will be. The best choice is chuck roast cut into bite-sized cubes. Chuck is well-marbled and full of connective tissue, which melts during a long simmer into rich, silky tenderness. Stew meat from the store is usually chuck or round and works fine, though round is leaner and can stay a touch firmer. Avoid lean cuts meant for quick cooking, like sirloin, because they turn dry and tough in a soup rather than tender. If you have leftover pot roast or brisket, it slots right in too. For the full comparison of cuts and how they behave over a long cook, our guide on pot roast vs beef stew breaks it down in detail.
Why browning matters
Pat the beef dry, season it with salt and pepper, and sear it in a hot pot with a little oil in batches, leaving room between the pieces. Crowding the pan steams the meat instead of browning it. Let each side develop a deep brown crust before turning, about three to four minutes a side. That crust is the Maillard reaction, and it is where most of the soup’s flavor comes from. The test kitchen at America’s Test Kitchen stresses the same point: browning meat in a single uncrowded layer is the foundation of a deeply flavored soup. Those browned bits stuck to the bottom of the pot, the fond, are pure savory gold that you will lift back into the broth in the next step. Brown the beef well and your soup tastes like it cooked for hours, even before it has.
Step 2: Build the Flavor Base
Once the beef is browned and resting on a plate, lower the heat to medium and add a diced onion to the same pot. Cook it in the beef drippings until soft and golden, about five to eight minutes, scraping up the fond as it loosens. Add minced garlic for a minute, then stir in a couple of tablespoons of tomato paste and cook it until it darkens to a rusty color, two to three minutes. This browning of the paste, the same trick that lifts a good tomato soup, adds deep umami.
Deglaze for extra depth
Now deglaze: pour in a splash of beef broth or, for a richer pot, half a cup of red wine, and scrape the bottom clean. Let the liquid bubble and reduce until nearly absorbed. This step pulls every bit of that browned flavor off the pan and into the soup. Deglazing with wine is the single move that makes a homemade beef soup taste restaurant-deep, but broth works perfectly well if you would rather skip the alcohol. Food publications like Bon Appetit rely on this same deglazing step to capture the fond in braises and soups.
Step 3: Simmer the Beef Until Tender
Return the beef and any juices to the pot. Add about 8 cups of beef broth, a 14-ounce can of diced or crushed tomatoes, a bay leaf, and a teaspoon each of dried thyme and oregano. Bring it to a boil, then drop to a low simmer, cover, and let it cook for 60 to 90 minutes. This is the most important stretch and the one people rush. Tough cuts like chuck need this time for the collagen to break down into gelatin, which is what makes the meat fork-tender and gives the broth its body. You cannot hurry it with higher heat; a hard boil only toughens the meat and clouds the broth. Keep it at a lazy simmer where just a few bubbles break the surface.
How to tell when the beef is ready
The beef is done when a piece pulls apart easily with gentle pressure from a spoon. If it still feels chewy or springy, it simply needs more time, so cover it back up and check again in 20 minutes. Patience here is the whole game. A well-made beef broth foundation helps too, and if you ever want to make your own from scratch, the principles are the same as in any long, slow stock.
Step 4: Add the Vegetables in the Right Order
This is where most homemade vegetable beef soups go wrong. Dump everything in at once and you get crunchy carrots next to disintegrated potatoes. The fix is to add vegetables in stages based on how long each one needs. Here is the order.
Cut the hearty vegetables into thick, even chunks so they hold their shape over the longer cook. The quick vegetables, especially frozen corn and peas, need only a few minutes to heat through, so adding them at the end keeps them bright and sweet instead of gray and tired. This staggered approach is the secret to a soup where every vegetable is cooked just right.
Fresh, frozen, or canned vegetables?
All three work, and you can mix them. Fresh vegetables give the best texture and are worth using for the hearty ones like potatoes and carrots. Frozen vegetables are a genuine shortcut, especially for corn, peas, and green beans, since they are picked and frozen at peak and need almost no prep; just add them near the end so they do not overcook. Canned vegetables like corn or beans are fine in a pinch, drained and added at the very end since they are already cooked. Frozen is often the smartest choice for the delicate vegetables and fresh for the sturdy ones.
Slow Cooker and Instant Pot Versions
You can make excellent vegetable beef soup in either appliance, and both are forgiving.
Slow cooker
Do not skip the browning. Sear the beef and soften the onion and tomato paste on the stove first, because the slow cooker cannot brown and that step is where the flavor lives. Then transfer everything, including the hearty vegetables and broth, to the slow cooker and cook on low for 6 to 7 hours or high for 3 to 4. Stir in the quick vegetables like frozen corn and peas in the last 20 to 30 minutes so they do not turn to mush. The long, gentle heat makes chuck meltingly tender, which is exactly what a slow cooker does best. This is the same low-and-slow logic behind any good Cajun gumbo that simmers for hours to deepen.
Instant Pot
Use the saute function to brown the beef and build the base right in the pot, deglaze well so nothing sticks and triggers a burn warning, then add broth, tomatoes, and hearty vegetables. Pressure cook on high for about 20 minutes with a natural release. After it opens, switch back to saute and add the quick vegetables for the last few minutes. The Instant Pot gets you tender beef in a fraction of the time, though many cooks feel the slowest methods still give the deepest flavor.
Seasoning and Herbs That Make the Difference

A vegetable beef soup lives or dies on seasoning, and it is easy to leave it tasting flat if you only reach for salt and pepper. The classic herb trio for beef soup is thyme, oregano, and a bay leaf, all added early so they have time to infuse the broth. Fresh rosemary, used sparingly, brings a woodsy note that suits beef especially well, but it is strong, so a single small sprig is plenty. Parsley goes in at the very end for a fresh, green lift. Beyond herbs, a few savory boosters quietly deepen the pot: a tablespoon of tomato paste (which you already added), a splash of Worcestershire sauce, a dash of soy sauce, or a Parmesan rind dropped in to simmer. Each of these adds umami, the savory depth that makes a soup taste meaty and complete. Salt should be added in layers, a little when you brown the beef and more at the end, and always taste right before serving, because chilling and reducing both change how salty a soup reads. A small splash of acid at the finish, whether red wine vinegar or a squeeze of lemon, wakes up the whole bowl and is the step most home cooks forget.
How to Customize Your Soup
One of the best things about vegetable beef soup is how flexible it is. Treat the recipe above as a framework and swap freely based on what you have. For a heartier, stew-like pot, add more potatoes and reduce the broth. For a brothier soup, go heavier on the liquid and lighter on the starchy vegetables. Barley, small pasta, or rice can be stirred in for a grain-based version, though cook pasta separately and add it at the end so it does not soak up all the broth and turn soft. Cabbage and green beans stretch the soup to feed more people for very little money, while mushrooms add a meaty, savory note if you sear them separately and stir them in near the end. You can lean Italian with extra oregano and a Parmesan rind, or take it in a different direction with smoked paprika and a little heat. The beef-and-broth base happily carries almost any combination of vegetables and seasonings, which is exactly why this soup has fed families for generations from whatever the season offered.
How to Fix Common Problems
- Beef is tough. It almost always just needs more time at a gentle simmer. Tough chuck becomes tender chuck with another 20 to 30 minutes; a hard boil will not speed it up and will only make it worse.
- Soup tastes flat. It usually wants salt, and often a splash of acid like a little vinegar or a squeeze of lemon to brighten it. A dash of Worcestershire or soy sauce adds savory depth too.
- Vegetables are mushy. They went in too early. Next time follow the staggered order and cut hearty vegetables in larger chunks.
- Broth is thin. Simmer it uncovered to reduce, or mash a few of the cooked potatoes against the side of the pot to thicken it naturally.
- Broth is greasy. Skim the fat off the top with a spoon, or chill the soup and lift off the solidified fat cap, which is easiest the next day.
Make-Ahead, Storage, and Freezing
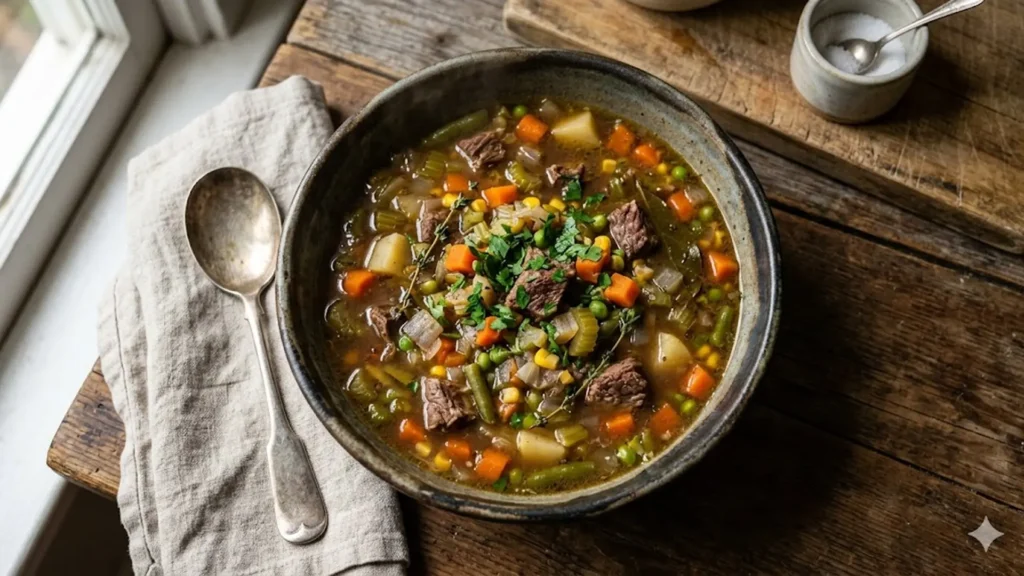
Vegetable beef soup is one of the best soups to make ahead, because the flavor deepens overnight as everything melds in the fridge. It keeps about four to five days refrigerated in a sealed container. It also freezes wonderfully for up to three months, which makes a big batch worth the effort. The one caveat is potatoes, which can turn slightly grainy after freezing and thawing; if you plan to freeze the whole pot, you can leave the potatoes a touch undercooked, or add them fresh when you reheat. Cool the soup before freezing, portion it into containers or flat freezer bags, and label them. Reheat gently on the stove, loosening with a splash of broth if it has thickened, and taste for salt again, since chilling dulls seasoning. For a balanced meal, a bowl pairs beautifully with crusty bread, and it slots neatly into a rotation of allergy-friendly gluten-free dinners.
Frequently Asked Questions
What is the best cut of beef for vegetable beef soup?
Chuck roast cut into cubes is the best choice because it is well-marbled and full of connective tissue that melts into tender, silky meat over a long simmer. Store-bought stew meat works too. Avoid lean cuts like sirloin, which turn dry and tough in soup. Leftover pot roast or brisket also works well if you have it on hand.
How long does it take to make vegetable beef soup?
On the stove, plan for about 90 minutes to 2 hours total, since the beef needs 60 to 90 minutes of gentle simmering to become tender before the vegetables go in. A slow cooker takes 6 to 7 hours on low but is mostly hands-off, while an Instant Pot can get tender beef in about 20 minutes of pressure cooking plus prep and release time.
Why is my beef still tough in the soup?
Tough beef almost always just needs more time. Cuts like chuck have to simmer gently long enough for the collagen to break down into tender gelatin, usually 60 to 90 minutes or more. A hard boil will not speed this up and actually toughens the meat, so keep the heat at a lazy simmer and cook it longer until a piece pulls apart easily.
When do I add the vegetables to vegetable beef soup?
Add vegetables in stages by how long they take to cook. Put hearty ones like potatoes and carrots in for the last 25 to 30 minutes, medium ones like green beans for the last 15, and quick ones like frozen corn and peas only in the final 5 minutes. This keeps every vegetable cooked just right instead of some mushy and others crunchy.
Can I use frozen vegetables in vegetable beef soup?
Yes, frozen vegetables are a great shortcut, especially for corn, peas, and green beans, since they are frozen at peak freshness and need no prep. Add them near the very end of cooking, in the last five minutes, so they heat through without overcooking. Use fresh vegetables for the sturdy ones like potatoes and carrots that simmer longer.
Does vegetable beef soup freeze well?
Yes, it freezes very well for up to three months and the flavor often improves. The only weak point is potatoes, which can turn slightly grainy after freezing, so leave them slightly undercooked or add them fresh when reheating if that bothers you. Cool the soup first, freeze it in portions, and reheat gently with a splash of broth to loosen it.
Bottom Line
Making vegetable beef soup is really about respecting four simple steps. Brown a well-marbled chuck hard for flavor, build a deep base with onion and browned tomato paste, simmer the beef low and slow until it is genuinely tender, and add your vegetables in stages so each one finishes at its best. Season generously, brighten it with a little acid, and do not rush the meat. Whether you cook it on the stove, in a slow cooker, or under pressure, the same logic holds: flavor comes from browning and time, and texture comes from the order you add things. Make a big pot, because it keeps for days, freezes for months, and tastes even better the second day.