If you want to know how to make vegetable stock, the short answer is this: chop a pound or two of aromatic vegetables, cover them with cold water, and simmer gently for about an hour. That is the whole skeleton of it. But the difference between a thin, watery pot of vegetable stock and a deep, golden one you actually want to ladle into soup comes down to which vegetables you choose, how you cut them, and how patiently you let them go. I have made this on my stovetop more times than I can count, and over the years I have learned where the flavor really comes from. This guide walks you through the raw method, the roasted method for a richer batch, the freezer scrap-bag trick, plus pressure cooker and slow cooker versions, so you can match the stock to the day you are having.
Homemade vegetable stock costs almost nothing, uses up odds and ends that would otherwise hit the trash, and tastes cleaner and brighter than anything from a carton. Once you have a quart or two stashed in the freezer, weeknight soup stops being a project and starts being a fifteen-minute habit. Let me show you exactly how I do it.
What Vegetable Stock Is and Why You Should Make Your Own
Vegetable stock is simply water that has been simmered with vegetables, aromatics, and herbs until it takes on their flavor, then strained clear. There is no animal protein in it, which sets it apart from chicken or beef stock and makes it the workhorse base for vegetarian and vegan cooking. People use the words stock and broth almost interchangeably for the vegetable version, since there are no bones involved, but I tend to call mine stock because it is meant as a building block rather than a finished sipping drink.
The case for making your own is easy. Store-bought cartons are convenient, but most lean heavy on salt and a vague, slightly sweet flavor that can flatten everything it touches. When you build your own pot, you control the salt, you skip the additives, and you decide whether it tastes of sweet roasted onion or fresh garden celery. You also turn scraps into something useful. The carrot peels, onion ends, leek tops, and mushroom stems that pile up during a week of cooking are exactly what a good stock is made of. If you already make your own broth bases, you may enjoy my full soup stock guide, which covers the broader family of stocks and where vegetable stock fits in.
The Best Vegetables to Use (and the Ones to Avoid)
")
The backbone of nearly every good vegetable stock is the trio of onion, carrot, and celery. Cooks sometimes call this the mirepoix, and it gives you a balanced base that is savory, faintly sweet, and aromatic all at once. From there you can layer in mushrooms for a deeper, almost meaty note, leeks for gentle sweetness, garlic for warmth, and a handful of fresh herbs like parsley stems, thyme, and a bay leaf. Tomatoes add body and a touch of acidity. Corn cobs, once the kernels are cut off, lend a surprising sweetness and are one of my favorite summer additions.
Just as important is knowing what to leave out. Brassicas, the cabbage family, are the big one. Broccoli, cauliflower, cabbage, Brussels sprouts, and kale stems all carry sulfur compounds that turn bitter and a little eggy when you simmer them for an hour. Beets will dye your whole pot magenta. Starchy vegetables like potatoes and winter squash make the stock cloudy and gummy. Bell peppers can dominate with a flavor that does not play well in every dish. And anything actually rotten or moldy belongs in the compost, not the pot. Slightly tired, wilted, or bruised produce is fine and even welcome, but soft and slimy is a hard no.
The Ratio of Vegetables to Water
This is the number that decides whether your stock tastes like something or like faintly seasoned water. My reliable starting point is 2 pounds of vegetables to 10 cups of cold water, which yields roughly 1 quart of finished stock after simmering and straining. That works out to about 1 pound of vegetables for every 5 cups of water. If you want a bolder, more concentrated stock to use as a base for risotto or a delicate soup, push it toward 2 pounds of vegetables for every 8 cups of water instead.
Always start with cold water and bring it up slowly. Cold water lets the vegetables release their flavor gradually as the temperature climbs, which gives you a cleaner, fuller result than dumping veg into a pot already at a rolling boil. Aim for a rough balance among your vegetables so no single one takes over, unless you are deliberately making, say, a mushroom-forward stock for a specific dish. Two pounds of mixed vegetables is about one large onion, two carrots, two or three celery stalks, a handful of mushrooms, and a few cloves of garlic, give or take whatever scraps you have on hand.
Step-by-Step Stovetop Method
This is the everyday raw method, the one I reach for most. It takes about an hour of mostly hands-off simmering and gives you a clean, fresh-tasting stock.
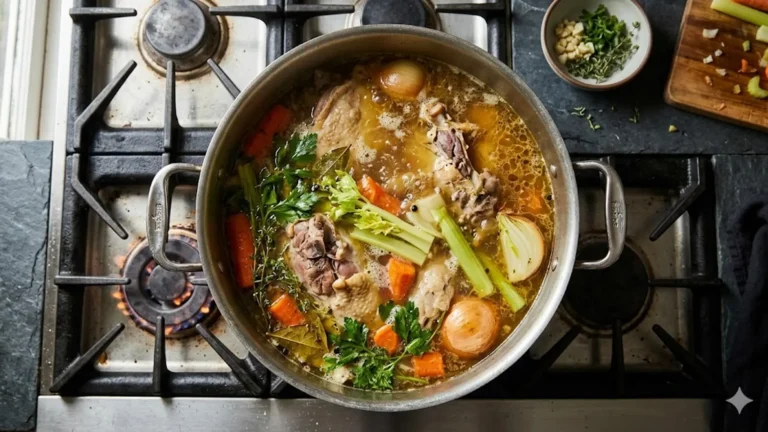
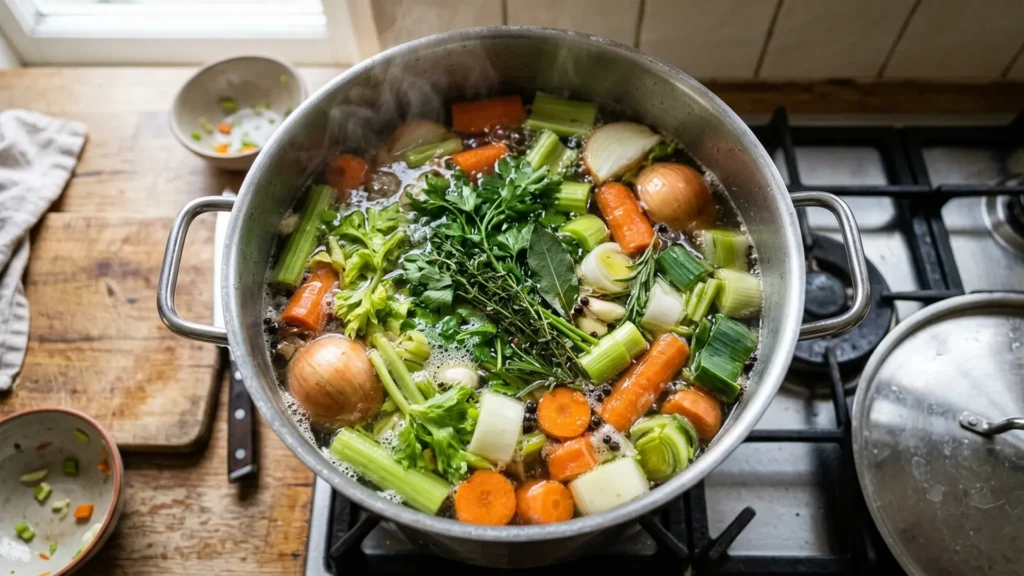
First, roughly chop your 2 pounds of vegetables. The shape does not matter, but smaller pieces, roughly 1 to 2 inches, give up flavor faster than big chunks. Leave the skins on the onion if it is clean, since the papery skins add a lovely golden color to the finished stock. Add everything to a large pot, at least 6 quarts, along with your herbs, a bay leaf, and about 10 whole black peppercorns.
Second, pour in 10 cups of cold water, enough to cover the vegetables by an inch or so. Set the pot over medium-high heat and bring it just to the edge of a boil, then immediately drop the heat to low. You want a bare simmer, where the surface barely shivers with a few lazy bubbles rather than a hard, churning boil. A hard boil emulsifies the fat and fine particles into the water and gives you cloudy, sometimes bitter stock. A gentle simmer keeps it clear.
Third, let it simmer uncovered or partly covered for 45 to 60 minutes. Resist the urge to go much longer with raw vegetables, since past about 90 minutes the flavors flatten and can turn slightly bitter or cabbagey even from friendly vegetables. Taste it around the 45-minute mark. When it tastes rich and savory, it is done.
Fourth, strain. Set a fine-mesh strainer over a large bowl and pour the stock through, pressing gently on the solids with the back of a ladle to squeeze out every bit of flavorful liquid. Discard the spent vegetables, which will be bland by now, or compost them. Let the stock cool, then season and store. That is the entire process, and the same logic carries over to meat-based versions like my chicken stock if you ever want to compare the two side by side.
Roasted Versus Raw: Choosing Your Flavor
Raw stock, the method above, tastes fresh, light, and green. It is perfect for spring soups, light vegetable broths, and anything where you want the other ingredients to shine. But when I want something with real backbone, the kind of deep, savory base that stands up to lentils or a hearty winter stew, I roast the vegetables first.
To roast, toss your chopped vegetables with a tablespoon of oil, spread them on a sheet pan, and roast at 425 degrees Fahrenheit for 30 to 40 minutes, turning once, until they are browned at the edges and caramelized. That browning is the Maillard reaction at work, the same chemistry that makes seared meat and toasted bread taste so good, and it builds layers of flavor that simply do not exist in raw stock. A tablespoon of tomato paste smeared on the vegetables for the last 10 minutes of roasting deepens the color and adds a savory, umami-rich note. Then scrape everything, including the browned bits stuck to the pan loosened with a splash of water, into your pot and proceed exactly as you would for the raw method.
Some cooks argue that browning makes stock cloudy and prefer to keep things pristine. I disagree for most everyday cooking. A little extra body and color is a fair trade for that much more flavor. Use raw when you want clarity and freshness, roasted when you want depth and richness. Both belong in your repertoire.
The Freezer Scrap-Bag Method
This is the trick that turned stock-making from a chore into something automatic for me. Keep a gallon zip-top bag or a lidded container in your freezer, and every time you cook, toss in the usable trimmings: onion ends and skins, carrot peels and tops, celery bottoms and leaves, leek tops, mushroom stems, herb stems, garlic skins, and corn cobs. The freezer halts spoilage, so you can collect over a week or two without anything going bad.
When the bag is full, roughly 6 to 8 cups of frozen scraps, you have your batch ready to go. Dump the scraps straight into the pot, no need to thaw, cover with about 10 cups of water, and simmer for an hour just like the raw method. The only rule that matters is the brassica rule: keep broccoli, cauliflower, and cabbage trimmings out of the bag, because they will make the whole batch bitter no matter how good everything else is. I keep a separate note on my freezer bag reminding me of that, because it is an easy mistake to make when you are scraping a cutting board in a hurry. This method costs you nothing extra and means you almost always have the makings of stock on hand.
Pressure Cooker and Slow Cooker Variants
The stovetop is my default, but the pot you use can fit the time you have. Both an electric pressure cooker and a slow cooker make excellent vegetable stock with even less attention.
For the pressure cooker, add your 2 pounds of vegetables and 10 cups of water (stay below the maximum fill line), lock the lid, and cook on high pressure for 30 minutes. Let the pressure release naturally for at least 15 minutes before opening, which keeps the stock from sputtering and lets the flavors settle. The sealed environment extracts flavor fast and concentrates it, so pressure cooker stock often tastes a touch stronger than the same vegetables simmered on the stove.
For the slow cooker, combine the same vegetables and water, set it to low, and walk away for 8 to 10 hours. This is the method I love for overnight stock or for days when I am out of the house. Because a slow cooker holds a low, steady temperature well below a hard boil, the stock stays remarkably clear, and the long, gentle extraction pulls a mellow, rounded flavor from the vegetables. Strain and store exactly as you would for the stovetop batch.
Seasoning and Salt

Here is my one firm rule about salt: go light, or leave it out entirely. The whole advantage of homemade stock is that you control the seasoning later, in the finished dish. If you salt the stock heavily and then reduce it in a soup, or use it where the recipe also adds salty ingredients like soy sauce or miso, you can end up with something inedible. I add about three-quarters of a teaspoon of kosher salt per quart as a gentle baseline, which keeps the stock tasting alive without committing it to anything. You can always add more at the end of cooking; you cannot take it back out.
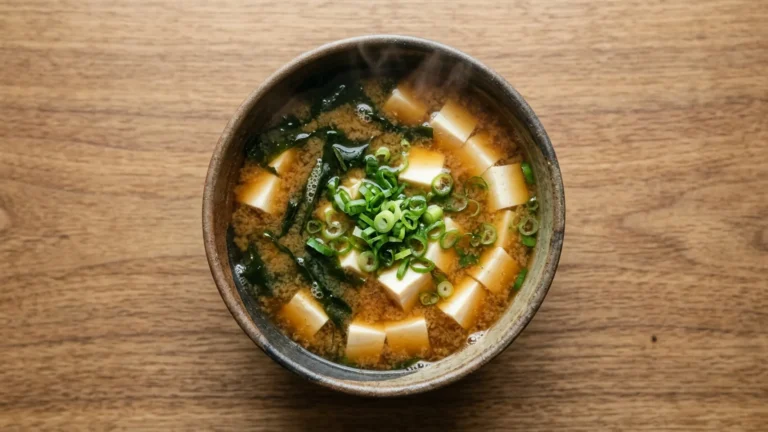
Beyond salt, the flavor builders are aromatics and herbs. Black peppercorns, a bay leaf, fresh thyme, and parsley stems are my standard. A splash of a neutral acid like a teaspoon of apple cider vinegar can brighten a flat-tasting batch. For an umami boost without meat, a strip of dried kombu seaweed, a few dried mushrooms, or a teaspoon of tomato paste all add savory depth. Taste as you go and trust your palate more than any rigid formula.
How to Store and Freeze Your Stock
Cool your stock quickly before storing it, since leaving warm stock to sit at room temperature for hours invites bacteria. The fastest way is to set the bowl of strained stock in a sink filled with ice water and stir it now and then until it drops to room temperature, then refrigerate. Once chilled, stock keeps in the fridge for about 4 to 5 days in an airtight container.
For longer storage, freeze it. I freeze most of mine in 1-cup and 2-cup portions so I can grab exactly what a recipe needs without thawing a giant block. Leave about an inch of headspace in the container, because liquid expands as it freezes. Frozen stock holds its quality for about 3 months, and is still safe well beyond that, though the flavor slowly fades. My favorite trick is to reduce a batch by half on the stove until it is concentrated, then freeze it in an ice-cube tray; each cube is a punch of flavor you can drop straight into a pan. When you reheat stock to use it, bring it to at least 165 degrees Fahrenheit to be safe, especially if it has been in the fridge a few days.
Common Mistakes to Avoid
Most disappointing stock comes from a handful of repeat mistakes, and they are all easy to fix once you know them. The first is too much water. If your stock tastes thin, you almost certainly used too little vegetable for the amount of water; pull back toward that 2 pounds per 10 cups ratio, or simmer the finished stock down to concentrate it. The second is boiling too hard. A rolling boil clouds the stock and can drag bitterness out of the vegetables, so keep it at a bare, gentle simmer the entire time.
The third mistake is oversalting early, which I covered above but it bears repeating because it ruins more batches than anything else. The fourth is sneaking in brassicas, even a few broccoli stems, which makes the whole pot taste sulfurous. The fifth is simmering raw vegetable stock far too long; unlike bone stock, vegetable stock peaks around the one-hour mark and then declines, turning dull and flat. And the last common one is forgetting to strain well, leaving grit and tiny particles that make the stock cloudy and muddy in the bowl. Press the solids, strain through fine mesh, and your stock will be clear and clean. Once you have a good batch, it becomes the base for everything, including a bowl of my homemade tomato soup on a cold afternoon.
Trusted Sources and Further Reading
I have refined my own method over a lot of pots and a lot of soup, but it never hurts to cross-check technique against the test kitchens that pressure-test their recipes. The folks at America’s Test Kitchen run side-by-side experiments on extraction time and vegetable ratios that are worth a read, and The Kitchn has a clear primer on the scrap-bag approach that lines up with how I keep my freezer bag going. Between a good ratio, a gentle simmer, and a little patience, you will land on a stock you reach for again and again.
Frequently Asked Questions
How long does homemade vegetable stock last?
In the refrigerator, homemade vegetable stock keeps for about 4 to 5 days in an airtight container. In the freezer it holds its quality for around 3 months, and stays safe longer than that, though the flavor gradually fades. Always cool it fully before storing and reheat to at least 165 degrees Fahrenheit before using.
What vegetables should I not put in vegetable stock?
Avoid brassicas like broccoli, cauliflower, cabbage, and Brussels sprouts, which turn the stock bitter and sulfurous. Skip beets, which dye everything magenta, and starchy potatoes and winter squash, which make it cloudy and gummy. Bell peppers can overpower a batch, so use them sparingly if at all. Anything rotten or moldy should be composted, not simmered.
Do I need to roast the vegetables first?
No, roasting is optional. Raw vegetables give you a fresh, light stock that is great for spring soups. Roasting at 425 degrees Fahrenheit for 30 to 40 minutes first builds a deeper, richer, more savory flavor through caramelization, which is better suited to hearty stews and winter dishes. Both methods are worth keeping in your rotation.
What is the ratio of vegetables to water for stock?
A reliable starting ratio is 2 pounds of vegetables to 10 cups of cold water, which yields about 1 quart of finished stock. For a more concentrated, bolder stock, use 2 pounds of vegetables to 8 cups of water instead. Always start with cold water and bring it up slowly for the cleanest flavor.
Can I make vegetable stock from kitchen scraps?
Yes, and it is one of the best ways to make it. Keep a bag in your freezer and collect onion ends, carrot peels, celery bottoms, leek tops, mushroom stems, and herb stems. When you have 6 to 8 cups, simmer them with about 10 cups of water for an hour. Just keep broccoli, cauliflower, and cabbage trimmings out of the bag so the batch does not turn bitter.
Why is my vegetable stock bitter or cloudy?
Bitterness usually comes from brassica scraps or from simmering raw vegetable stock too long, past about 90 minutes. Cloudiness comes from boiling too hard, which emulsifies fine particles into the liquid, or from not straining well. Keep the pot at a bare simmer, stop at around the one-hour mark, and strain through fine mesh for a clear, clean result.
Bottom Line
Making vegetable stock is one of the highest-reward, lowest-effort habits you can build in the kitchen. Start with the trio of onion, carrot, and celery, add mushrooms and herbs, keep your ratio near 2 pounds of vegetables to 10 cups of cold water, and simmer gently for an hour. Roast the vegetables first when you want depth, lean on your freezer scrap bag to make it nearly free, and reach for the pressure cooker or slow cooker when time is tight. Season lightly, cool quickly, and freeze in usable portions. Do that, and you will always have a clean, flavorful base waiting for the next pot of soup, which is exactly the kind of quiet kitchen luxury that makes everyday cooking feel a little more like home.