How to make soup stock is the first skill I think any soup cook should own, because the stock decides how good the soup can possibly be. You can have a flawless recipe and the freshest vegetables, but if the liquid underneath them is thin and flat, the bowl will be thin and flat too. A real homemade stock, on the other hand, gives you that deep, savory, slightly sticky body that makes people put their spoon down and ask what you did. The good news is that a stock is mostly patience. It asks for cheap ingredients, a big pot, and a few hours of gentle heat. There is almost no skill barrier, only a handful of details that separate a cloudy, greasy pot from a clear, gelatinous one.
I am Elsie, and I keep stock in my freezer the way other people keep ice. In this guide I will walk you through the difference between stock and broth, the exact ratios I use, the mirepoix that flavors nearly every pot, whether to roast or blanch your bones, how to keep the liquid clear, why your stock should turn to jelly in the fridge, and how to fix it when it does not. We will cover chicken, beef, and vegetable stock with real simmer times, then how to store and use what you make.
Stock Versus Broth: What Is Actually Different
People use the words interchangeably, and in everyday cooking that is fine, but there is a real distinction. Stock is made primarily from bones and simmered long enough to pull collagen out of them, which turns to gelatin and gives the liquid body. A good stock sets to a soft jelly when chilled. Broth is traditionally made more from meat than bones, seasoned, simmered for a shorter time, and meant to be sipped on its own. The practical takeaway is that stock is the richer building block you cook other things in, while broth is closer to a finished product. For most soups, what you actually want is a stock, because that gelatin is what gives the final bowl its luxurious mouthfeel. If you want to understand what all that body does for you nutritionally, my honest look at whether beef broth is good for you covers the collagen and mineral side in detail.
The Ingredients and Ratios That Matter

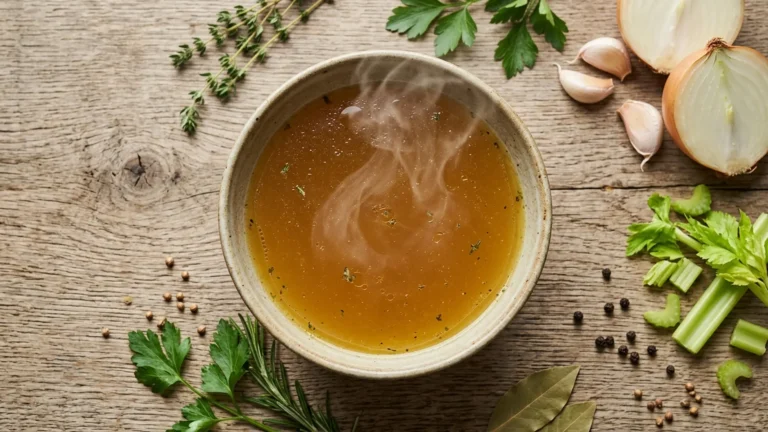
A stock has only three real components: bones, aromatics, and water. The ratios are forgiving, but here is the framework I work from. For bones, use roughly one to one and a half pounds of bones per quart of water. A leftover roast chicken carcass plus a few extra wings makes a fine pot with about ten cups of cold water. For beef, ask your butcher for marrow bones and knuckle bones, which are loaded with collagen. Always start with cold water and bones together so the proteins release slowly and the stock stays clear.
The aromatic base is the classic mirepoix: two parts onion, one part carrot, one part celery by volume. For a standard pot I use one large onion, two carrots, and two ribs of celery. Add a few smashed garlic cloves, a bay leaf or two, a small handful of parsley stems, some thyme, and about a teaspoon of whole peppercorns. Notice what is missing: salt. Leave stock unsalted or barely salted, because you will reduce it and season the final dish later, and a stock that was salted upfront can end up far too salty once concentrated.
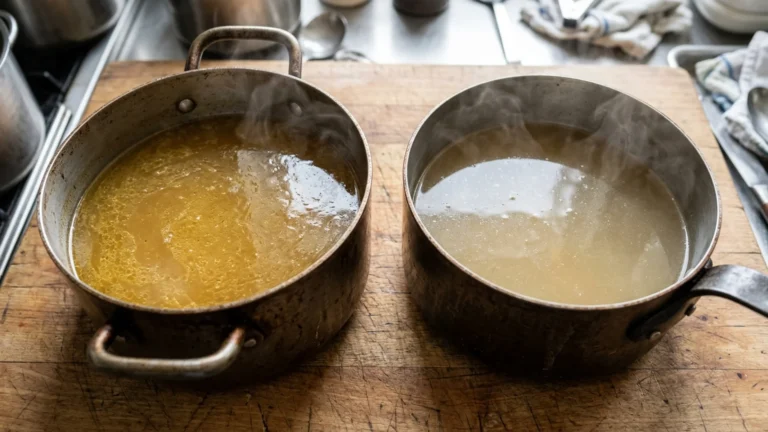
To Roast or To Blanch: Choosing Your Bones
This is where you decide the character of your stock. You have two starting moves and they pull in opposite directions. Roasting the bones first, at around 425 degrees for about 30 to 45 minutes until deeply browned, gives you a dark, rich, beefy stock with caramelized depth. This is what you want for a beef stock destined for a hearty soup or a French onion. Sauteing your aromatics until golden adds the same kind of depth. The low-and-slow richness this builds is the same principle behind a great braise, which is why my method for a crock pot beef stew starts with the same browning step.
Blanching, by contrast, gives you a clean, pale, neutral stock. You cover the raw bones with cold water, bring them to a boil for a few minutes, then dump that first water and its scum, rinse the bones, and start fresh. This removes the impurities that cloud a stock and is the move for a delicate chicken stock you want crystal clear. You generally do one or the other. A roasted chicken carcass from last night’s dinner skips both and works just fine for an everyday pot.
The Golden Rule: Never Let It Boil
If you remember one thing about how to make soup stock, make it this. Bring the pot up to a boil, then immediately drop it to the barest simmer, where you see just a lazy bubble break the surface every few seconds. A hard, rolling boil is the single biggest reason home stocks turn out cloudy and greasy. The violent motion emulsifies the rendered fat and loose proteins back into the liquid instead of letting them rise to the top where you can skim them off. Keep it at a whisper of a simmer for the entire cook and your stock will stay clear, clean, and refined.
Skimming: The Habit That Makes Clear Stock
For the first thirty minutes, a gray foam will rise to the surface. That is coagulated protein and impurity, and skimming it off with a spoon or ladle is what gives you a clean-tasting, clear stock. Check the pot every fifteen to twenty minutes early on, then less often as the foam slows down. Skim the fat too if a thick layer builds up, though much of the fat is easier to remove after chilling, when it solidifies into a cap you can lift right off. Do not stir the pot. Stirring breaks up the solids and clouds the liquid. A stock wants to be left alone.
Simmer Times by Stock Type
Time is what extracts the collagen, and each kind of bone needs its own. Chicken stock wants three to four hours at a gentle simmer, long enough to draw out the gelatin without turning the meat to mush or the flavor flat. Beef and pork stock are the marathon: six to eight hours, because those denser bones release their collagen slowly. Fish stock is the sprint, just thirty minutes to an hour, since fish bones give up their flavor fast and turn bitter if pushed longer. Vegetable stock needs only about an hour, because there is no collagen to extract and longer cooking just makes the vegetables taste tired and dull. If you have a pressure cooker, you can compress most of these dramatically, getting a rich chicken or beef stock in around an hour to ninety minutes.
Vegetable Stock Without the Bones
Vegetable stock follows the same logic minus the collagen. Build it on the mirepoix, then add depth with mushrooms for umami, a tomato or a splash of tomato paste for body, leek tops, and herb stems. This is the place to use your kitchen scraps. Keep a bag in the freezer of onion ends, carrot peels, celery bottoms, mushroom stems, and parsley stalks, and when it fills up, simmer it into stock. Avoid anything from the cabbage family and avoid bitter greens, since they can turn the whole pot acrid. Simmer about an hour, strain, and you have a clean base for any meatless soup. Because vegetable stock has no gelatin, it will not gel in the fridge, and that is normal.
Why Your Stock Should Turn to Jelly

Here is the test of a great bone stock: chill it overnight and it should wobble like soft jelly. That gelatin is the collagen you spent hours extracting, and it is exactly what gives soup its silky, satisfying body. If your stock sets firm, you nailed it. If it stays completely liquid, it usually means one of a few things: not enough bones relative to water, not enough collagen-rich bones like knuckles and feet, or not a long enough simmer. To fix a weak stock, you can return it to the pot and reduce it by simmering uncovered to concentrate what gelatin is there, or simply use more and bonier bones next time. A splash of apple cider vinegar at the start of the cook also helps draw minerals and collagen from the bones.
Common Mistakes That Ruin a Stock
Most stock failures trace back to a short list of avoidable habits. Boiling too hard is the big one, and it gives you that cloudy, greasy result every time. Crowding the pot is another. If you cram in too many bones and barely cover them with water, the stock cannot circulate and extract evenly, so use enough cold water to submerge everything by an inch or two. Adding salt early backfires once you reduce. Walking away and letting it cook overnight on high will overextract chicken and fish bones, drawing out bitter compounds and a flat, scorched note. Tossing in starchy vegetables like potatoes clouds the liquid as they break down, so keep those out. And forgetting to skim during that first crucial half hour locks the impurities into the finished stock. None of these are hard to avoid once you know them, but each one quietly drags a stock from excellent down to merely passable.
One more subtle mistake is using too many strongly flavored or overpowering ingredients. A stock should taste savory and round, not loudly of any single thing. Resist the urge to throw in every herb in the drawer. The classic combination of onion, carrot, celery, garlic, bay, thyme, and parsley exists because it produces a balanced background flavor that complements anything you build on top of it later.
Putting Your Stock to Work
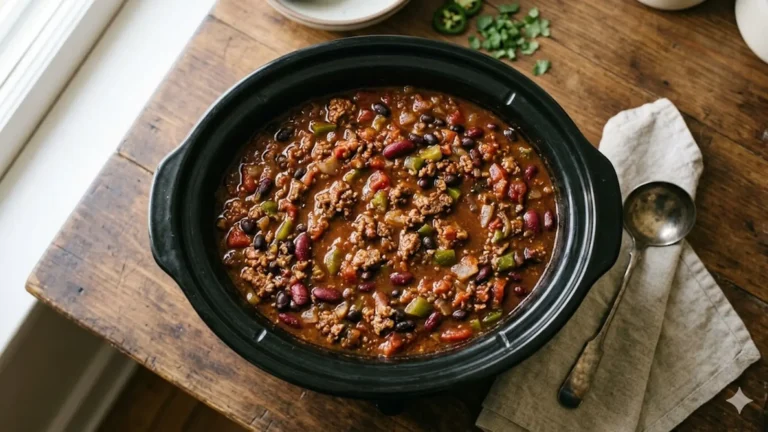
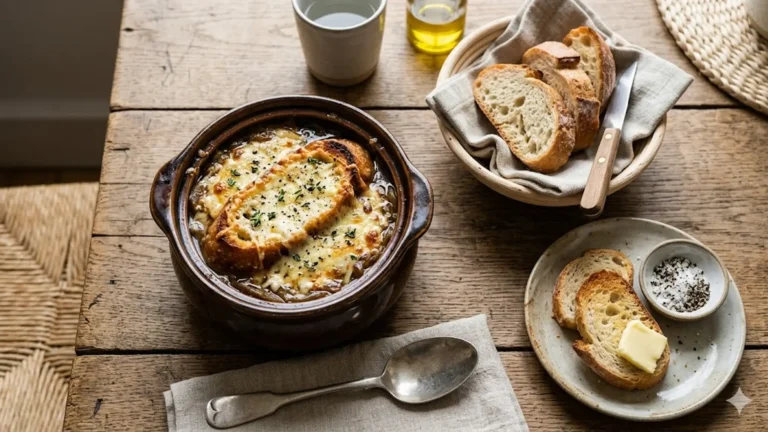
Once you have a freezer full of stock, the soups practically make themselves. A good stock is the entire reason a homemade tomato soup tastes worlds better than canned, since the body and savor come from the base rather than from cream or sugar. My guide to a perfect homemade tomato soup leans on exactly this kind of stock to get a rich, rounded bowl. Beyond soup, use your stock to cook grains and risotto instead of water, to deglaze a roasting pan into a pan sauce, to braise vegetables or meat, and to thin out a sauce that needs savory depth rather than just liquid. The gelatin that makes your stock gel in the fridge is what gives all of these dishes a glossy, restaurant-quality finish. Stock is the single most leveraged thing you can keep on hand, because it quietly improves nearly everything else you cook.
Storing and Freezing Your Stock
Cool the strained stock to room temperature first, ideally by setting the pot in an ice bath, then refrigerate. The fat will rise and harden into a cap overnight, which you can lift off and discard or save for cooking. Stock keeps four to five days in the fridge. For longer storage, freeze it for up to six months. I freeze most of mine in quart containers for soup bases, but I also freeze some in an ice cube tray so I have small portions for deglazing a pan or boosting a sauce. Leave headspace in any container, since liquid expands as it freezes. Labeled and dated, a freezer full of homemade stock turns weeknight soup into a fifteen-minute job.
Frequently Asked Questions
What is the difference between stock and broth?
Stock is made mainly from bones simmered long enough to extract collagen, which gives it body and lets it gel when chilled. Broth is made more from meat, is usually seasoned, and is simmered for a shorter time so it can be sipped on its own. For building soups, stock is generally what you want because its gelatin gives the finished bowl a richer mouthfeel.
How long should I simmer soup stock?
It depends on the bones. Chicken stock needs three to four hours, beef and pork stock six to eight hours, fish stock just thirty minutes to an hour, and vegetable stock about an hour. A pressure cooker can shorten meat stocks to around an hour to ninety minutes. The goal is to extract collagen fully without pushing past the point where flavors flatten.
Why is my stock cloudy?
Cloudiness almost always comes from boiling too hard. A rolling boil emulsifies fat and loose proteins back into the liquid instead of letting them rise to be skimmed. Keep the pot at the barest simmer, skim the foam during the first half hour, start with cold water, and avoid stirring. Blanching the bones first also helps produce a noticeably clearer stock.
Do I need to roast the bones first?
Not always. Roasting bones until deeply browned gives you a dark, rich stock, which suits beef and any soup that wants depth. For a clean, pale chicken or fish stock you can skip roasting, or even blanch the bones to remove impurities. A leftover roasted chicken carcass needs no extra step at all and makes an excellent everyday stock.
Why did my stock not gel in the fridge?
A stock gels because of the gelatin extracted from collagen-rich bones. If yours stayed liquid, you likely used too few bones for the amount of water, did not include collagen-heavy bones like knuckles or feet, or did not simmer long enough. Reducing the finished stock concentrates it, and adding a splash of vinegar at the start helps pull more collagen out next time. Vegetable stock never gels, which is normal.
Should I salt my stock?
Keep stock unsalted or only lightly salted. Stock is a building block you will often reduce, and reducing concentrates any salt already in it. If you salt it heavily upfront, the soup or sauce you make later can turn out far too salty. Season the final dish to taste instead, where you have full control.
The Takeaway
Learning how to make soup stock changes the way you cook far beyond soup. It turns scraps and leftover bones into the most useful thing in your freezer, and it gives every braise, risotto, and sauce a depth that no boxed product can match. The whole craft comes down to a few unglamorous rules: cold water to start, a whisper of a simmer never a boil, faithful skimming, the right time for the bones you are using, and no salt until the end. Master those and your stock will gel in the fridge and carry your soups for months. Start with a single roast chicken carcass this week, freeze the result, and you will quickly see why I treat a pot of stock as the most valuable thing in my kitchen rather than an afterthought. For more on building deep flavor in long-simmered dishes, both America’s Test Kitchen and Bon Appetit have excellent technique libraries worth keeping bookmarked.