A slow cooker soup is any soup you build by layering ingredients in a crock, covering them with just enough broth, and letting low, steady heat do the work for several hours instead of standing over a stovetop pot. The short version of the method: brown your meat and aromatics first if you have ten extra minutes, add hearty ingredients and broth at the start, cook on LOW for 7 to 9 hours or HIGH for 4 to 6, and stir in anything delicate (cream, pasta, rice, fresh greens) only in the last stretch. That is the whole game. Get the timing and the add order right and almost any soup you love on the stove will work in a slow cooker. This guide walks through every part of that so you can stop guessing and start dumping.
I am Elsie, and I keep a crock running on the counter from the first cold week of fall straight through spring. A slow cooker is the most forgiving tool I own for soup, because soup wants exactly what the machine gives it: long, gentle, even heat that softens tough cuts and melts flavors together without scorching the bottom. Below I cover why the machine works so well, how long different soups actually need, what to brown, when to add the fragile stuff, how much liquid to use, how to fix a pot that went wrong, and how to turn any stovetop recipe into a dump-and-go favorite.
Why a Slow Cooker Is Made for Soup
Most cooking tools fight you a little. A slow cooker does not. It heats a ceramic insert gradually, surrounds it with a low heating element, and traps steam under a sealed lid so moisture circulates instead of boiling off. For soup, that combination is close to ideal. The gentle heat breaks down collagen in tough, cheap cuts like chuck and chicken thighs until they go fork-tender, and the sealed lid means you can leave the house for the afternoon without a pot boiling dry.
The trade-off is that the slow cooker does almost nothing with high, dry heat. It will not brown meat, it will not caramelize onions, and it will not reduce a thin broth down to something concentrated. Those are real flavor steps, and the machine skips them. The good news is that you can do the high-heat work yourself in ten minutes before the crock takes over, and I will show you exactly where it pays off. Understand that single trade-off, hands-off braising in exchange for no browning, and every other decision in this guide makes sense.
There is one more quiet advantage worth naming: very little liquid escapes. On the stove, an hour of simmering can boil away a cup or more of broth, which is why stovetop soups taste concentrated. In a crock, almost nothing evaporates. That changes how much liquid you start with, and it is the single most common reason a first slow cooker soup comes out watery.
LOW vs HIGH: Timing by Soup Type

The most useful rule to memorize is that one hour on HIGH is roughly two hours on LOW. Food reaches a gentle simmer in about 3 to 4 hours on HIGH versus 7 to 8 hours on LOW, and from there it keeps tenderizing. For most soups I prefer LOW, because the long, slow approach is gentler on vegetables and lean meat and gives flavors more time to marry. HIGH is for the days you started late.
Timing depends far more on what is in the pot than on the soup’s name. Beans need the longest. Tough beef cuts need a long stretch too. Chicken breast, by contrast, overcooks fast and turns chalky if you forget it. Here is the chart I actually use, with each row built around the ingredient that needs the most time.
Two cautions on this chart. First, dried kidney beans contain a natural toxin that a slow cooker does not get hot enough to destroy on its own, so boil them hard for 10 minutes before they go in the crock. Canned beans skip this entirely. Second, if a recipe mixes a long ingredient and a short one, like beef and fresh green beans, cook the long one through and add the short one near the end. The chart tells you which ingredient sets the clock.
What to Brown First, and Why It Matters
This is the step most people skip and most people regret. The slow cooker cannot brown anything, so any browning has to happen in a skillet before the crock takes over. It is optional in the sense that the soup will still cook through without it. It is not optional if you want the soup to taste like it took effort.
Brown your meat first. Pat beef stew chunks or chicken thighs dry, sear them hard in a hot pan with a little oil until they have a brown crust, then transfer them to the crock. That crust is built from the same browning reaction that gives a seared steak its flavor, and it dissolves into the broth over the long cook, giving the whole pot a deeper, meatier backbone. The cooks at America’s Test Kitchen have shown repeatedly that this one step is the biggest single flavor upgrade for braised and slow-cooked meat.
Sweat your aromatics next. In the same pan, with the browned bits still stuck to the bottom, soften your onions, carrots, celery, and garlic for a few minutes, then pour a splash of broth in and scrape the bottom to lift all that flavor. Tip the whole thing, fond and all, into the crock. If you only have time for one extra step, brown the meat. If you have time for two, do the aromatics as well. Everything else can simply go in raw.
When to Add Dairy, Pasta, Rice, and Greens
Here is where most slow cooker soups go sideways. The machine cooks everything for the same long stretch, but not every ingredient can survive that. Cream curdles, pasta turns to mush, rice goes gluey, and fresh greens collapse into slime if they cook for eight hours. The fix is simple: add these late, not at the start.
Dairy goes in at the very end. Heavy cream, milk, sour cream, and shredded cheese should be stirred in during the last 15 to 30 minutes, with the lid off and the heat low, just long enough to warm and melt. Add them early and the long heat will break them into a grainy, separated mess. If you want a creamy soup that simmers all day, build the body with pureed potato or a can of coconut milk, which both hold up, and save the real dairy for the finish.
Pasta and rice go in near the end too. Dry pasta needs only the last 20 to 30 minutes on HIGH; any longer and it bloats and falls apart. Rice is similar, roughly the last 30 to 45 minutes depending on the type. If you are making a big batch to reheat over several days, I cook the pasta or rice separately and add it to each bowl, because grains and noodles keep absorbing liquid in the fridge and turn a leftover soup into a paste.
Tender greens go in last of all. Spinach, kale, chard, and fresh herbs need only the final 5 to 15 minutes, just long enough to wilt. Stir them in, put the lid back on for a few minutes, and serve. The same goes for quick-cooking vegetables like zucchini, peas, and broccoli, which turn to mush over a full cook but stay bright if you add them near the end.
How Much Liquid to Use
This is the rule that fixes more failed slow cooker soups than any other, so I will say it plainly: use less liquid than your stovetop instinct tells you to. Because almost nothing evaporates in a sealed crock, the broth you start with is roughly the broth you end with. A stovetop recipe expects to lose a cup or two over a long simmer, so if you pour in the full amount, you get soup that tastes thin and looks pale.
My working method is to add ingredients to the crock, then pour broth over the top until it just covers everything by about half an inch, and no more. The vegetables and meat will release their own juices as they cook, so the level rises on its own. If the finished soup is thicker than you want, it is a two-minute fix to stir in more hot broth at the end. Pulling liquid out of a too-thin pot is much harder.
If you are converting a recipe you love, a good starting point is to cut the liquid by about a quarter. For a soup that called for eight cups of broth on the stove, start with six in the crock and adjust at the end. The folks at The Kitchn make the same point in their slow cooker soup principles, and it tracks with every pot I have made: the machine that loses no steam needs less water going in.
Season at the End, Not the Start
Long cooking does strange things to seasoning. Salt added at the start can read as too strong by hour eight because the flavors have concentrated. Whole spices and dried herbs can fade or turn dull over a long cook, and delicate fresh herbs lose their punch entirely. So I season lightly at the start, just enough to wake the ingredients up, and do the real seasoning in the last 20 minutes once I can taste the finished pot.
At the end, taste and then adjust in this order: salt first, then acid, then heat, then fresh herbs. A pot that tastes flat almost always wants salt or a squeeze of lemon or a splash of vinegar, not more cooking time. A little acid at the finish brightens a soup that has gone heavy and one-note after hours in the crock. Stir in fresh herbs, black pepper, and any hot sauce right before serving so they taste alive rather than stewed.
Food Safety in a Slow Cooker
A slow cooker is safe when you respect a few numbers. The danger zone for bacteria is 40 to 140 degrees Fahrenheit, and the goal is to move food through that range without lingering. Three habits keep you clear of trouble.
First, fill the crock between half and two-thirds full. A crock that is too empty heats unevenly, and one that is overfilled may not reach a safe temperature in the center in time. Second, always start with thawed meat, never frozen. A block of frozen meat sits in the danger zone far too long as it slowly thaws inside a low crock. Third, cook to the right internal temperature: 165 degrees for any poultry, 145 degrees for beef, pork, and lamb. A cheap instant-read thermometer settles every argument. Finally, do not use the slow cooker to reheat leftover soup, because it heats too gradually to be safe for that job; reheat on the stove or in the microwave until it steams, then transfer to the crock to hold warm if you like.
Converting a Stovetop Recipe to the Slow Cooker

Almost any soup or stew you make on the stove can move to the crock with a few adjustments. The translation is mechanical once you know the four things that change.
Cut the liquid by about a quarter, as covered above, because nothing evaporates. Brown the meat and sweat the aromatics in a skillet first, since the crock cannot. Hold back the fragile ingredients, the dairy, pasta, rice, and greens, for the end. And stretch the time: a soup that simmers 45 minutes on the stove generally wants 6 to 8 hours on LOW or 3 to 4 on HIGH. Beyond those four, the recipe is the same. Same vegetables, same broth, same herbs, just reordered for the machine.
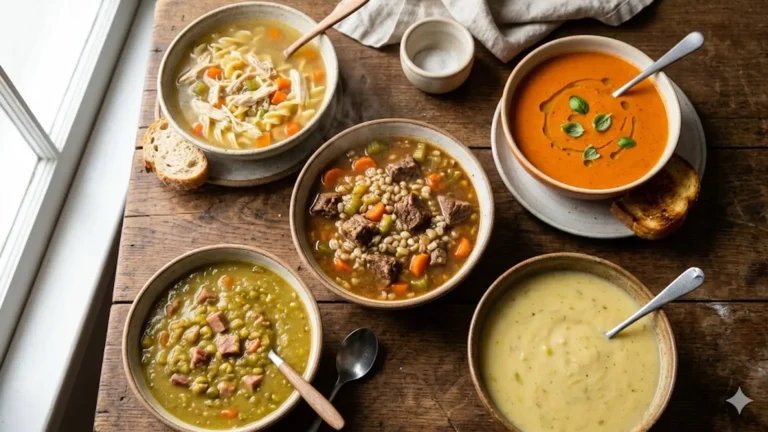
The soups that convert best are the long, brothy, forgiving ones: bean soups, beef and barley, chicken soups built on thighs, lentil soups, chilis, and tomato-based vegetable soups. My slow cooker beef stew is the classic example of a stovetop braise that became better hands-off, and a hearty minestrone shows how a vegetable-heavy soup adapts once you add the pasta and greens at the end. The soups that convert worst are the quick, delicate ones built on seafood, eggs, or a last-minute cream finish, where long heat works against you.
Dump-and-Go Favorites and Troubleshooting
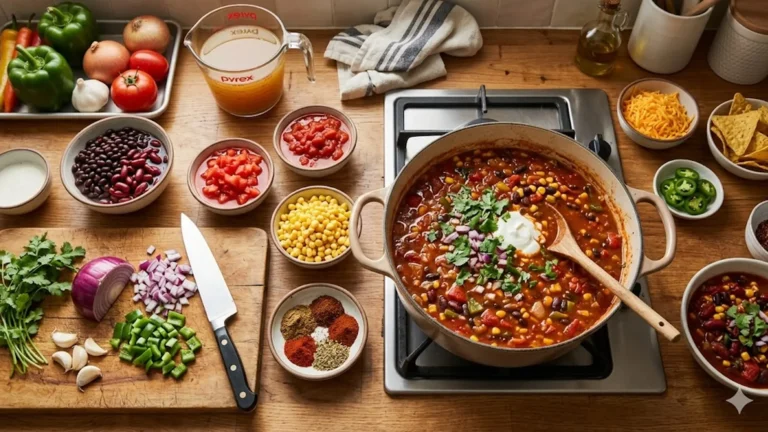
Some soups need no browning at all and reward you for being lazy. These are the dump-and-go pots: throw everything in raw, set the timer, and walk away. Bean and lentil soups, split pea, chili with canned beans, tortilla soup, and most chicken-thigh soups all fall here. They forgive a skipped sear because beans, tomatoes, and long-cooked aromatics carry the flavor on their own. A dump-and-go pot is my answer to a busy weeknight, and it is where the slow cooker truly earns its keep.
When a pot does go wrong, the fix is usually quick. Here is how I read the three most common problems.
Watery, thin soup
Almost always too much starting liquid. Fix it at the end: stir in a slurry of cornstarch and cold water, mash some of the potatoes or beans against the side to release starch, or simmer with the lid off on HIGH for 30 minutes to thicken. Next time, start with less broth.
Bland, flat flavor
Usually a seasoning problem, not a cooking-time problem. Add salt first, then a splash of acid like lemon or vinegar, then fresh herbs. If it is still dull, the base lacked browning; a spoonful of tomato paste or a teaspoon of bouillon stirred in at the end adds the depth that the skipped sear would have given.
Mushy vegetables
The delicate veg cooked too long. Quick-cooking vegetables and greens belong in the last stretch, not at the start. Next time, add zucchini, peas, broccoli, and greens in the final 15 to 30 minutes, and keep only the hardy roots in from the beginning.
Cleanup and Everyday Care
Cleanup is the easiest part. Let the ceramic insert cool before you wash it, because a hot crock under cold water can crack. Soak any stuck-on bits for a few minutes and they lift off without scrubbing. Most inserts are dishwasher safe, but check your model. If you make slow cooker soup often, a box of disposable liners is worth it for the messiest pots, though for a clean brothy soup I usually skip them. Wipe the heating base with a damp cloth, never submerge it, and you are done.
Frequently Asked Questions
Can I put raw meat directly in a slow cooker soup?
Yes, raw meat is safe to put straight in as long as it is thawed and the soup reaches a safe internal temperature, 165 degrees for poultry and 145 for beef and pork. It will cook through fine. The only thing you lose by skipping the sear is flavor and color, not safety. For dump-and-go bean and chicken-thigh soups, raw is completely standard.
Is LOW or HIGH better for soup?
LOW is better for most soups because the gentle heat is kinder to vegetables and lean meat and gives flavors more time to blend. Use HIGH when you are short on time. One hour on HIGH is roughly two hours on LOW, so a soup that needs 8 hours on LOW will be ready in about 4 to 5 on HIGH.
Why is my slow cooker soup watery?
You almost certainly started with too much liquid, since a sealed crock loses very little to evaporation. Fix it by stirring in a cornstarch slurry, mashing some potatoes or beans to release starch, or simmering with the lid off for 30 minutes. Next time, use about a quarter less broth than a stovetop recipe calls for.
When do I add cream and cheese to slow cooker soup?
Add dairy in the last 15 to 30 minutes, with the heat low. Cream, milk, sour cream, and cheese will curdle or turn grainy if they cook for hours. If you want a creamy soup that simmers all day, build the body with pureed potato or coconut milk and stir the real dairy in at the very end.
Can I leave a slow cooker on all day while I am out?
Yes, that is exactly what a slow cooker is designed for. A working unit on LOW is safe to run unattended for 8 to 10 hours. Keep the crock between half and two-thirds full, start with thawed ingredients, and set it on a clear, heat-safe surface away from the wall. That hands-off, all-day cook is the whole reason the machine exists.
Do I need to brown the meat first?
No, but it makes a real difference. Browning meat and sweating aromatics in a skillet before they go in the crock builds a deeper, meatier flavor that the slow cooker cannot create on its own. If you have ten minutes, do it. If you do not, a dump-and-go bean, lentil, or tomato-based soup will still taste good without it.
The Bottom Line
A slow cooker soup is one of the most reliable warm meals you can put on the table, and the method comes down to a handful of habits: brown what you can in a skillet first, use about a quarter less broth than the stove would need, cook the hearty stuff long on LOW, and hold back the cream, pasta, rice, and greens for the final stretch. Season at the end, mind the simple safety numbers, and you can turn nearly any soup you love into a hands-off pot that cooks itself while you do something else. Keep this guide handy the next time you fill the crock, and you will spend a lot less time guessing and a lot more time eating.